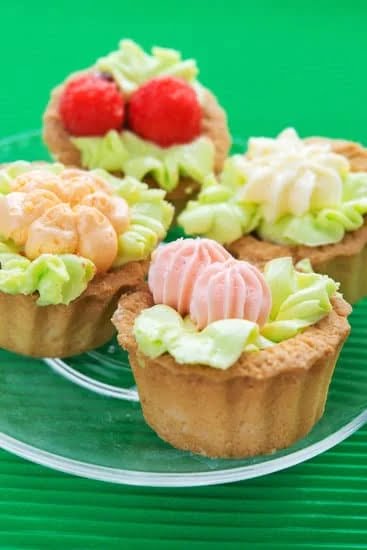
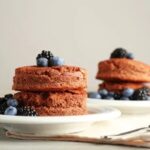
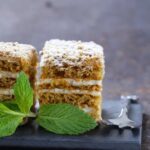
Cake decorating is an art form that requires attention to detail, precision, and creativity. However, before you can create a masterpiece on top of your cake, it’s essential to start with a solid foundation – the cake decorating base. The cake decorating base serves as the canvas for your design, providing stability and structure to ensure your creation stands tall and looks visually appealing.
A well-executed cake decorating base not only enhances the overall appearance of your cake but also plays a crucial role in its taste and texture. It sets the stage for the flavors and fillings you’ll add later, providing a perfect balance of sweetness and moisture. Whether you’re a novice baker or an experienced pastry chef, understanding the importance of a sturdy and delicious cake decorating base is key to achieving professional-looking results.
In this article, we will delve into various aspects of the cake decorating base. We’ll discuss its significance in creating visually stunning cakes that are also delectable to eat. From understanding the role of the cake decorating base to exploring different techniques and troubleshooting common issues, we’ll guide you through each step of the process. Additionally, we’ll provide expert advice from professional cake decorators who have mastered the art of creating stunning cake bases for special occasions.
So grab your apron, get ready to level up your baking skills, and let’s dive into the captivating world of cake decorating bases.
Understanding the Role of the Cake Decorating Base
When it comes to cake decorating, the base is a crucial component that sets the stage for the entire design. The cake decorating base provides stability and support for your creations, ensuring that they not only look visually appealing but also maintain their shape. In this section, we will delve deeper into the role of the cake decorating base and how it contributes to a successful cake decoration.
The Foundation of Stability
The primary purpose of a cake decorating base is to create a stable foundation for your cake. A well-constructed base ensures that your cake stands tall and doesn’t wobble or collapse under its own weight. This becomes especially important when you are working with multi-tiered or elaborate cake designs.
One common mistake beginners make is neglecting to provide proper support for their cakes. Using a sturdy base, such as a thick cardboard or acrylic board, can prevent sagging or sinking in the middle of your creation. It also allows you to transport your cakes without any mishaps.
A Canvas for Creativity
The cake decorating base serves as a canvas upon which you can bring your creative vision to life. Whether you choose to cover it with fondant, royal icing, buttercream frosting, or other decorative elements, the base plays an important role in enhancing and complementing your overall design.
Consider choosing a color or texture for your base that complements the theme or color scheme of your overall design. For example, if you’re creating a floral-themed cake, a simple white fondant base can serve as an elegant background to showcase your flower decorations.
Additionally, you can use piping techniques or edible embellishments to further enhance the look of your base. Adding intricate patterns or designs on the sides of your cake board can elevate its visual appeal and make it stand out even more.
Understanding the role of the cake decorating base is crucial for every aspiring cake decorator. By providing stability and acting as a blank canvas for your creativity, the base sets the stage for a stunning cake decoration. In the next section, we will explore the essential tools and ingredients you need to create a perfect cake decorating base.
Essential Tools and Ingredients for Creating a Perfect Cake Decorating Base
To create a perfect cake decorating base, it is important to have the right tools and ingredients. While there are many different tools available in the market, some essential ones include a cake turntable, an offset spatula, a bench scraper, and a pastry brush.
A cake turntable is crucial for achieving smooth and even decorations on your cake. It allows you to easily rotate the cake while you work, ensuring that every angle of the cake receives equal attention. An offset spatula is another must-have tool that helps in spreading icing or frosting evenly on the cake’s surface. Its angled blade allows for precise control and smooth application.
In addition to these tools, a bench scraper can be used to create clean edges and straight sides on your cake. It is perfect for creating sharp lines and smoothing out any imperfections. A pastry brush also comes in handy when working with fondant or gum paste. It can be used to remove excess powdered sugar or cornstarch from the surface of the decorations for a polished finish.
Apart from the tools, having high-quality ingredients is equally important for creating a perfect base. Use fresh eggs at room temperature for better emulsification and lighter texture in your cakes. Good quality butter and sugar also contribute to a moist and tender crumb. It is recommended to use cake flour instead of all-purpose flour as it has lower protein content, resulting in a softer texture.
These essential tools and ingredients are crucial for achieving professional-looking results when creating a perfect cake decorating base. Investing in these items not only makes your job easier but also ensures that your cakes turn out deliciously beautiful every time you decorate them.
Step-by-Step Guide
Preparing and leveling the cake is a crucial step in creating the perfect cake decorating base. This section will provide a step-by-step guide to help you achieve a smooth and even surface for your cake.
Step 1: Cooling and Leveling the Cake
After baking your cake, allow it to fully cool before starting the preparation process. Once cooled, carefully remove the cake from the pan and place it on a clean work surface. If necessary, trim any uneven or domed tops using a serrated knife.
Step 2: Crumb Coat
Before applying any frosting or decorations, it’s important to create a crumb coat. This thin layer of frosting helps to seal in any loose crumbs, providing a smooth base for further decoration. Use a offset spatula to spread a thin layer of frosting across the entire cake, making sure to cover all exposed surfaces.
Step 3: Frosting and Smoothing
Once the crumb coat is set, apply a thicker layer of frosting onto the cake. Use an offset spatula or bench scraper to spread the frosting evenly over the sides and top of the cake. Start by applying more frosting than needed and then use your tools to smooth it out evenly. Remember to wipe off excess frosting as you go.
Step 4: Leveling
To ensure that your cake sits flat when placed on a serving plate or tiered stand, it’s important to level it properly. Use a long serrated knife or a leveler tool specifically designed for cakes to trim any excess from the top surface of the cake layers.
Following these steps will help you achieve a perfectly prepared and leveled cake ready for decorating. It’s important to take your time during this process as it sets the foundation for an aesthetically pleasing and professional-looking final product.
| Steps | Description |
|---|---|
| Step 1 | Cooling and Leveling the Cake |
| Step 2 | Crumb Coat |
| Step 3 | Frosting and Smoothing |
| Step 4 | Leveling |
Exploring Different Types of Cake Decorating Bases and Techniques
One of the exciting aspects of cake decorating is the endless possibilities when it comes to choosing a base and techniques. By exploring different types of cake decorating bases, you can create unique and visually appealing designs that will impress your friends and family. In this section, we will delve into various cake decorating bases and techniques that will help take your creations to the next level.
Buttercream Base
Buttercream is a classic choice for creating a cake decorating base. It is smooth, creamy, and easy to work with. There are different variations of buttercream bases, including American buttercream, Swiss meringue buttercream, and Italian meringue buttercream. Each type has its own flavor profile and texture, allowing for creative freedom in your decorations.
For a simple yet elegant look, consider using a smooth buttercream base on your cake. Smooth it over with an offset spatula or use a piping bag fitted with a large round tip for a more textured appearance. You can also experiment with adding food coloring to create vibrant colors or using stencils to achieve intricate designs.
Fondant Base
Fondant offers a sleek and polished finish for your cake decorating base. It is a pliable icing that can be rolled out and draped over the cake like a smooth sheet. Fondant allows you to achieve sharp edges and clean lines on your cake design.
To create a fondant base, start by covering your cake with buttercream icing to ensure that the fondant adheres smoothly. Dust your work surface with powdered sugar or cornstarch to prevent sticking. Roll out the fondant to fit the size of your cake and carefully drape it over the top, smoothing out any air bubbles or wrinkles as you go.
Drip Technique
The drip technique has gained popularity in recent years due to its visually striking effect. With this technique, you create a base of buttercream or ganache and then pour a contrasting colored icing over the top. As it drips down the sides of the cake, it creates an eye-catching effect that adds depth and dimension.
To achieve the drip technique, start by preparing a smooth base using buttercream or ganache. Once in place, allow it to set slightly before adding the contrasting icing. Using a spoon or piping bag, carefully pour the icing around the edges of the cake, allowing it to naturally drip down. Experiment with different colors and consistencies for unique effects.
By exploring different types of cake decorating bases and techniques like buttercream, fondant, and drip technique, you can elevate your cake designs and create show-stopping creations that are sure to impress. Remember to experiment with colors, textures, and flavors to add your personal touch to each creation. With these techniques in your arsenal, your cakes will become works of art.
Enhancing the Flavors of Your Cake Decorating Base
Creating a visually appealing cake decorating base is important, but it’s equally essential to ensure that it tastes delicious as well. Enhancing the flavors of your cake decorating base can take your creation to the next level and leave a lasting impression on your guests. Here are some tips and tricks to help you achieve a mouthwatering taste for your cake.
- Infusing Flavors: One way to enhance the flavors of your cake decorating base is by infusing it with different flavors. You can do this by adding extracts, such as vanilla, almond, or citrus, to the cake batter. Another option is incorporating zest from fruits like lemons or oranges into the mixture. Additionally, you can experiment with spices like cinnamon, nutmeg, or cardamom to add depth and complexity to the flavor profile.
- Soaking Syrups: Another technique to enhance the flavors of your cake decorating base is by using soaking syrups. These syrups add moisture and intensity to the cake layers while imparting distinct flavors. Consider using flavored simple syrups made with ingredients like fruit juices, liqueurs, or even coffee. Brushing these syrups onto each layer before frosting will ensure that every bite is bursting with flavor.
- Filling Options: Don’t limit yourself to just frosting when it comes to filling your cake decorating base. Get creative with different fillings that complement the overall flavor profile of your cake design. Consider options like fruit preserves or compotes, caramel sauce, cream cheese fillings, or even chocolate ganache. These fillings can add a surprising burst of flavor in every slice.
Remember that taste testing during the baking process is crucial in order to adjust any additional flavorings needed for balance and harmony within your cake decorating base. Experimenting with different combinations allows you to create a unique flavor experience for each cake you make.
By employing these tips and tricks, you can ensure that your cake decorating base not only looks stunning but also tastes absolutely divine. Experiment with different flavors, fillings, and techniques to create an unforgettable taste sensation that will leave your guests craving for more.
Troubleshooting
One of the most frustrating aspects of cake decorating is running into issues with your cake decorating base. However, understanding common problems and knowing how to fix them can save the day and ensure a flawless finished product. In this section, we will explore some of the most common issues that arise when preparing a cake decorating base and provide helpful solutions.
- Cracked or Sunken Cake: One of the most common problems encountered when baking a cake is a cracked or sunken surface. This can happen due to various reasons, such as overmixing the batter, using expired leavening agents, or opening the oven door during baking.
To fix this issue, you can try filling any cracks with buttercream icing or whipped cream and then smoothing it out with a spatula. For sunken cakes, trim off the excess from the top and use a layer of frosting to level it out. - Unevenly Baked Cake: Another issue that you may face is an unevenly baked cake, where parts are undercooked while others are overcooked. This can occur due to an uneven oven temperature or improper positioning of the cake in the oven.
To rectify this problem, you can turn off the oven when you notice that some parts are done while others need more time. Then cover the fully baked portion with aluminum foil to prevent it from burning while allowing the other parts to finish baking. - Sticky or Moist Base: A sticky or moist cake base can be frustrating as it makes it difficult to work with fondant or other decorations. This problem can arise from underbaking or inadequate cooling before applying frosting or decorations.
To fix this issue, let your cake cool completely on a wire rack before adding any frosting or decorations. If you have already frosted your cake and notice stickiness, refrigerate it for some time to firm up the icing.
| Issue | Solution |
|---|---|
| Cracked or Sunken Cake | Fill cracks with icing, trim sunken portions, and level with frosting |
| Unevenly Baked Cake | Turn off oven, cover cooked portion with foil, and continue baking |
| Sticky or Moist Base | Cool cake completely before frosting, refrigerate if already frosted |
By being knowledgeable about common problems that can occur with your cake decorating base and knowing how to fix them, you can ensure that every cake you decorate turns out beautifully. Now let’s move on to the next section where we will explore creative ideas for cake decorating bases for special occasions.
Showcasing Creative Cake Decorating Base Ideas for Special Occasions
Creating a cake decorating base is not just about providing a sturdy foundation for your design, but it is also an opportunity to showcase creativity and add an extra touch of excitement to special occasions. Whether it’s a birthday party, wedding, or holiday celebration, incorporating unique cake decorating base ideas can elevate the overall presentation and make your creation stand out. Here are some creative ideas to inspire you:
- Chocolate Ganache Base: For chocolate lovers, a chocolate ganache base is a decadent and rich option. Simply pour warm ganache over the top of your cake and let it drip down the sides for an elegant and indulgent look.
- Ombre Buttercream Base: Add a pop of color to your cake by creating an ombre effect with different shades of buttercream icing. Start with a light shade at the bottom and gradually darken the icing as you move towards the top.
- Floral Fondant Embellishment: Take inspiration from nature by decorating your cake base with beautifully crafted fondant flowers. Whether it’s roses, daisies, or tulips, these delicate and edible decorations will add a touch of sophistication to any occasion.
- Edible Lace Base: Create a romantic and intricate look by applying edible lace to your cake base. Using lace molds and edible lace mix, you can achieve a delicate design that resembles real lace.
- Sprinkle Coated Base: For a fun and festive touch, cover your cake base in colorful sprinkles or nonpareils. This option works especially well for children’s parties or joyful celebrations where bright colors are welcome.
- Metallic Foil Base: Make your cake shine with sophistication by using metallic foil on the base. Gold or silver foil can create an elegant look that is perfect for weddings or upscale events.
Remember, when showcasing creative cake decorating base ideas for special occasions, always consider the theme or purpose of the event as well as personal preferences of the celebrants. Let your imagination run wild and have fun experimenting with different techniques and designs to create a cake base that truly stands out.
Expert Advice
In conclusion, creating a solid cake decorating base is essential for a stunning and professional-looking cake. By understanding the role of the cake decorating base and using the right tools and ingredients, you can achieve a flawless foundation for your cake. Following a step-by-step guide to prepare and level the cake will ensure that it is ready for decorating.
Exploring different types of cake decorating bases and techniques can bring variety to your creations. From buttercream to fondant, each type of base offers unique opportunities for creativity. Additionally, enhancing the flavors of your cake decorating base with tips and tricks can elevate the taste of your creation.
While troubleshooting may be necessary at times, having an understanding of common issues with your cake decorating base will allow you to fix them confidently. Whether it’s cracking fondant or unevenly baked layers, there are solutions available to help you overcome these challenges.
Finally, showcasing creative ideas for special occasions can inspire you to push the boundaries of your cake decorating skills. By seeking expert advice from professional cake decorators, you can learn their secrets for achieving a stunning cake decorating base.
In summary, mastering the art of creating a stunning cake decorating base is crucial for any aspiring or experienced baker. With attention to detail, practice, and guidance from professionals in the industry, you can create beautiful cakes that will impress both visually and in taste.
Frequently Asked Questions
What are cake bases called?
Cake bases are typically called cake boards or cake rounds. These are flat, sturdy surfaces that provide support to the cake and make it easier to transport and decorate.
They are often made of cardboard or foam, and come in various sizes to accommodate different cake sizes and shapes. Cake boards not only serve as a foundation for the cake, but they also add an elegant touch when displayed on serving trays or stands.
What should I put under my cake?
It is recommended to put some kind of base under your cake to provide stability and prevent any potential damage. Placing your cake on a sturdy surface, such as a cake board or a serving plate, helps distribute the weight evenly and prevents the cake from sinking into softer surfaces like tablecloths or weak cardboard plates.
Additionally, having a base under your cake makes it easier to transport without causing any structural damage or compromising its shape and appearance.
Do I need a cake base?
The use of a cake base is not strictly necessary, but it is highly advised for most cakes. While smaller cakes might be able to hold their shape without the additional support of a cake board, larger or more intricate designs benefit greatly from having a stable base. A cake base provides an extra layer of protection and support, especially during transportation or when stacking multiple tiers of cakes together.
It helps maintain the overall structure of the cake, prevents any sagging or slippage, and allows for cleaner cuts and presentation when serving. Ultimately, using a cake base ensures that your creation remains intact and visually appealing throughout its lifespan from preparation to consumption.

Welcome to our cake decorating blog! My name is Destiny Flores, and I am the proud owner of a cake decorating business named Cake Karma. Our mission is to provide delicious, beautiful cakes for all occasions. We specialize in creating custom cakes that are tailored specifically to each customer’s individual needs and tastes.


