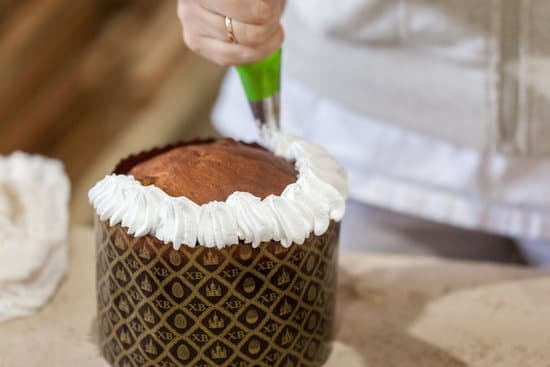
Cake decorating is an essential part of creating visually appealing and delicious cakes. One of the crucial tools in cake decorating is the cake decorating bag, which allows you to add intricate designs and patterns to your baked creations. Knowing how to assemble a cake decorating bag is a fundamental skill that can elevate your cake decorating abilities and help you unleash your creativity in the kitchen.
Understanding the components of a cake decorating bag is key to mastering the art of cake decoration. The bag, tip, and coupler are all essential parts that work together to create beautiful designs on your cakes. By familiarizing yourself with each component and its purpose, you can effectively use them to achieve the desired results in your decorating endeavors.
Once you have a good grasp of the components, it’s important to choose the right tip for your design. Different tips produce various effects, so selecting the appropriate one for your design is crucial. Experimenting with different tips can also help you discover new techniques and create unique designs that will set your cakes apart.
Understanding the Components
Assembling a cake decorating bag may seem like a daunting task, but understanding the components of the bag is essential for successful cake decorating.
Components of a Cake Decorating Bag
The main components of a cake decorating bag include the bag itself, a coupler, and decorating tips. The bag is typically made of plastic or cloth and holds the icing or frosting for decoration. The coupler consists of two parts – a base and a ring – that allows you to easily switch between different tips without emptying the bag. Decorating tips come in various shapes and sizes to create different designs on cakes, cupcakes, and other baked goods.
Purpose and Function
Each component of the cake decorating bag serves a specific purpose. The bag holds the icing or frosting securely, while the coupler allows for easy tip changes and improves control over piping. Decorating tips determine the design that will be created, such as rosettes, leaves, shells, or borders. Understanding how these components work together is crucial for successful cake decorating.
How to Assemble Cake Decorating Bag Components
To assemble the cake decorating bag properly, start by inserting the desired tip into the base of the coupler. Then place the ring over the base and twist it until it is secure. Once assembled, screw on the ring to secure both pieces together. Finally, snip off a small portion at the end of the bag and insert the coupler inside, pushing it through until it reaches near the tip.
Understanding how each component works and fits together is essential for assembling a cake decorating bag properly. By taking time to learn about these components and their functions, you can elevate your cake decorating skills and create stunning designs on your baked goods.
Choosing the Right Tip
When it comes to cake decorating, choosing the right tip is crucial in achieving the desired design and look for your cakes. The type of tip used can greatly impact the outcome of the decoration, so it’s important to understand how different tips work and how to select the appropriate one for your specific design. Whether you’re aiming for intricate lace patterns or simple borders, the right tip can make all the difference.
Guide on Selecting Decorating Tips
There are various types of decorating tips available, each serving a specific purpose. For intricate details and fine lines, a round tip may be ideal. For creating stars and rosettes, a star tip would be most suitable. Understanding the functions of each tip will help you choose the right one for your design. Additionally, consider the size of the tip in relation to the size of the cake and the overall design you want to achieve.
Experimenting With Different Tips
Once you have a collection of decorating tips at your disposal, don’t be afraid to experiment with them to discover unique designs and patterns. You can mix and match tips to create custom designs or try using unconventional tips for unexpected results. By experimenting with different tips, you’ll expand your range of decorating abilities and develop your own signature style.
Ultimately, choosing the right decorating tip is an essential step in cake decorating. Knowing how to select a suitable tip for different designs will allow you to create professional-looking decorations that enhance the overall appearance of your cakes. Experimentation with various tips will further hone your skills and open up new creative possibilities when it comes to cake decoration.
Preparing the Bag
Before you can start decorating your cake, it’s crucial to properly prepare your cake decorating bag. This step is essential in ensuring that your decorating experience goes smoothly and that you achieve the desired results. In this section, we will provide you with step-by-step instructions on how to prepare the cake decorating bag before assembling it with the necessary components.
First, make sure to gather all your materials: a clean and dry cake decorating bag, the selected decorating tip, and a coupler if necessary. It’s important to use a sturdy bag that can handle the pressure of squeezing out icing or frosting without bursting. Additionally, ensure that the chosen tip fits securely into the coupler if using one.
Next, cut the end of the cake decorating bag to accommodate the size of the selected tip or coupler. It’s essential to make a precise and clean cut to avoid any leakage during decoration. If using a coupler, insert it into the bag and then secure it with either a ring or by twisting and tying off the end of the bag.
Finally, before filling your prepared cake decorating bag with icing or frosting, it’s recommended to practice piping on a piece of parchment paper or a spare plate to get comfortable with controlling the flow and mastering different techniques. This will help you avoid any common mistakes when preparing and using your cake decorating bag.
| Materials | Instructions |
|---|---|
| Cake decorating bag | Ensure it is clean and dry |
| Decorating tip | Select appropriate size for design |
| Coupler (optional) | If using one for easy tip change |
Assembling the Cake Decorating Bag
Before you can start decorating your cakes with precision and artistry, it’s crucial to learn how to assemble a cake decorating bag. This essential skill will elevate your cake decorating game and allow you to create stunning designs with ease. Here’s a step-by-step guide on how to assemble a cake decorating bag and some tips for ensuring success.
1. Gather Your Supplies: First, make sure you have all the necessary components for assembling the cake decorating bag. You will need a piping bag, a coupler, and a decorating tip. The piping bag can be made of plastic or cloth, while the coupler is used to secure the tip in place and allow for easy tip changes.
2. Inserting the Coupler: Start by placing the coupler inside the piping bag. Push it all the way down to the bottom of the bag so that it lays flat against it. This will ensure that the tip sits securely on top of the coupler without any wobbling.
3. Attaching the Tip: Once the coupler is in place, it’s time to attach the decorating tip of your choice. Simply screw it onto the coupler until it’s snugly secured. Make sure it’s on tight to avoid any icing leaks while decorating your cakes.
4. Securing the Bag: Once both the coupler and tip are in place, fold down about 2 inches of the top of the piping bag over your hand to form a cuff. Then, hold onto this cuff with one hand and use your other hand to scoop or pour icing or frosting into the bag.
By following these steps on how to assemble a cake decorating bag, you’ll be well on your way to creating beautifully decorated cakes effortlessly.
Filling the Bag
Once you have assembled your cake decorating bag and chosen the right tip for your design, the next step is to fill the bag with icing or frosting. This step is crucial in ensuring that you have enough material to work with while decorating your cakes. Here’s how to effectively fill a cake decorating bag without making a mess.
First, prepare the icing or frosting you will be using for decorating. Make sure it is at the right consistency for piping – not too runny, but also not too stiff. Then, twist the open end of the decorating bag to keep it closed and secure. This will prevent any icing from leaking out as you fill the bag.
Next, spoon your prepared icing or frosting into the bag, making sure not to overfill it. It’s best to start with small amounts and add more as needed, as an overstuffed bag can be difficult to handle and control. You can use a spoon or spatula to push the icing down into the bag, ensuring there are no air pockets inside.
Finally, once the bag is filled with your desired amount of icing, gently untwist and re-twist the open end again to seal it. Remember to release any air bubbles by gently squeezing a small amount of icing out of the tip before starting your decorating process. Following these steps will ensure that your cake decorating bag is properly filled and ready for use.
| Step | Instructions |
|---|---|
| 1 | Twist open end of bag closed |
| 2 | Spoon icing into bag in small amounts |
| 3 | Seal open end tightly after filling |
Practice Techniques
Assembling a cake decorating bag is an essential skill for anyone looking to elevate their cake decorating abilities. Once you have mastered the art of assembling a cake decorating bag, it opens up endless possibilities for creating unique and beautiful designs on your cakes. In this section, we will provide suggestions for practicing with the assembled cake decorating bag to improve your skills and examples of simple designs to start with for beginners.
To begin practicing with your assembled cake decorating bag, start with basic techniques such as creating straight lines, swirls, dots, and writing simple words or phrases. These foundational skills will help you gain confidence in using the decorating bag and develop better control over the icing or frosting. You can practice these techniques on a sheet of parchment paper or a practice board before attempting them on an actual cake.
Once you feel comfortable with the basic techniques, you can move on to more advanced designs such as creating intricate floral patterns, borders, and other decorative elements. Experiment with different tips to see how they create varying textures and shapes. Don’t be afraid to get creative and try new things – this is where the fun and excitement of cake decorating truly begins.
Remember, practice makes perfect when it comes to using a cake decorating bag. The more you experiment and hone your skills, the better you will become at creating stunning designs on your cakes. Don’t be discouraged by initial mistakes – they are simply part of the learning process. With time and dedication, you will soon find yourself confidently wielding your assembled cake decorating bag to create professional-looking cakes that are sure to impress.
Maintenance and Storage
Maintaining and storing your assembled cake decorating bag is essential for ensuring its longevity and optimal performance. Here are some tips on how to properly care for and store your cake decorating bag:
- Cleaning: After using the cake decorating bag, it’s crucial to clean it thoroughly to prevent any icing or frosting from drying and clogging the tip. Disassemble the components of the bag and wash them with warm, soapy water. Use a small brush to remove any residue from the tip and coupler. Allow the components to air dry completely before reassembling.
- Storage: Once the cake decorating bag is clean and dry, store it in a cool, dry place away from direct sunlight. It’s best to keep the components disassembled when not in use to prevent any moisture buildup inside the bag.
Proper maintenance and storage of your cake decorating bag will not only extend its lifespan but also ensure that it is always ready for use whenever you need it. By following these simple steps, you can keep your cake decorating bag in excellent condition for many future baking projects.
Lastly, maintaining a collection of different tips allows decorators to achieve various designs fitting numerous styles: flowers, lines, letters, squiggles per doodles can all be made with just some basic tips. Mastering sample techniques as basketweave or brush embroidery ahead of time makes sure that skilled decorators can practice at their leisure instead of looking up intricate designs when there’s a big occasion coming up – showcasing impressive techniques procrastinated over months before really pays off.
Conclusion
In conclusion, mastering the art of assembling a cake decorating bag is essential for anyone looking to elevate their cake decorating skills. Understanding the components, choosing the right tip, and properly assembling the bag are all crucial steps in achieving beautiful and professional-looking cake designs. By following the step-by-step instructions and tips provided in this guide, you can confidently assemble a cake decorating bag and unleash your creativity in decorating cakes.
Knowing how to assemble a cake decorating bag allows you to experiment with different tips and techniques, ultimately leading to unique and personalized cake designs. With practice, you can improve your skills and create stunning decorations that will impress both yourself and others. Whether you’re a beginner or an experienced baker, the knowledge of how to assemble a cake decorating bag is an invaluable skill that will take your cake decorating to the next level.
In addition to practicing techniques with the assembled bag, it’s important to also focus on maintenance and storage. Properly cleaning and storing the components of the bag will ensure their longevity and continued use for future cakes.
By following these tips and recommendations, you can continue to improve your cake decorating skills while also taking care of your tools. So don’t be afraid to experiment, practice, and enjoy the process of creating beautifully decorated cakes with your assembled cake decorating bag.

Welcome to our cake decorating blog! My name is Destiny Flores, and I am the proud owner of a cake decorating business named Cake Karma. Our mission is to provide delicious, beautiful cakes for all occasions. We specialize in creating custom cakes that are tailored specifically to each customer’s individual needs and tastes.


