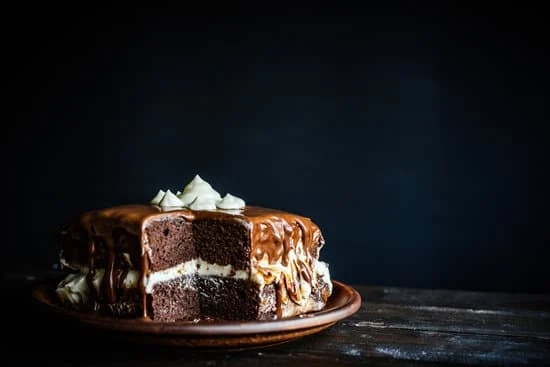
Decorating cakes with melted chocolate is a delightful way to add flair and creativity to your baked creations. In this article, we will delve into the art of cake decorating with a focus on how to melt chocolate for this purpose. Whether you are a seasoned baker looking to up your decorating game or a beginner eager to learn the basics, mastering the skill of melting chocolate is essential for creating visually appealing and delicious desserts.
Properly melted chocolate plays a crucial role in cake decorating, as it provides the perfect consistency for piping intricate designs, drizzling over cakes, or creating decorative accents. The right type of chocolate and the method used for melting can make all the difference in achieving smooth, glossy results that enhance the overall aesthetic of your creations. Understanding these factors will set you on the path to becoming a skilled decorator with chocolate.
From selecting the appropriate type of chocolate for melting to choosing between using a double boiler or microwave method, there are various considerations to keep in mind when embarking on this culinary journey. By exploring different techniques and incorporating tips for successful chocolate melting processes, you can elevate your cake decorating skills and bring your sweet creations to life in an artistic and delicious way.
Importance of Properly Melted Chocolate in Cake Decorating
Properly melted chocolate plays a crucial role in cake decorating, as it serves as a versatile medium that can be used to create intricate designs, add decorative accents, or even write messages on cakes. When chocolate is melted correctly, it becomes smooth and glossy, making it easier to work with and providing a professional finish to your creations.
Whether you are a beginner or an experienced baker, mastering the art of melting chocolate for cake decorating can elevate the overall look and taste of your desserts.
One of the key reasons why properly melted chocolate is essential in cake decorating is its ability to adhere well to different surfaces. Whether you are drizzling it over a cake, dipping fruit into it, or piping intricate designs onto cupcakes, melted chocolate that has reached the right consistency will set quickly and hold its shape without any issues. This ensures that your decorations stay intact and look visually appealing until the moment they are served.
Another important aspect of using properly melted chocolate in cake decorating is its flavor profile. When chocolate is overheated or not melted correctly, it can become grainy, lumpy, or even burnt, resulting in a less-than-desirable taste experience for anyone enjoying your baked goods.
By taking the time to melt your chocolate with care and attention to detail, you can preserve its rich and indulgent flavor while enhancing the overall presentation of your cakes. With the right techniques and methods at your disposal, you can easily master how to melt chocolate for cake decorating and take your creations to the next level.
Choosing the Right Type of Chocolate for Melting
When it comes to cake decorating with melted chocolate, choosing the right type of chocolate is crucial for achieving the desired results. Not all chocolates are created equal, and some are better suited for melting than others.
One of the key factors to consider is the cocoa content of the chocolate. Dark chocolate with a higher percentage of cocoa solids is preferred for melting as it has less sugar and other additives that can affect the texture and consistency when melted.
Another important consideration when choosing chocolate for melting is the quality of the ingredients. Opting for high-quality chocolate will not only result in a better flavor but also make the melting process smoother and more consistent. Look for reputable brands known for their premium chocolate products to ensure a delicious end result.
For those looking to add a touch of color or flavor to their melted chocolate for cake decorating, there are several options available. Food coloring gels or powders specifically designed for use with chocolate can be added to achieve vibrant hues without compromising the texture of the melted chocolate. Additionally, flavored extracts such as vanilla, almond, or peppermint can be incorporated to enhance the taste of the melted chocolate and complement the overall flavor profile of your decorated cake.
| Importance | Details |
|---|---|
| Cocoa Content | Opt for dark chocolate with higher cocoa solids |
| Quality | Choose high-quality chocolate from reputable brands |
| Coloring & Flavoring | Use food coloring gels or flavored extracts to enhance melted chocolate |
Methods for Melting Chocolate
Melting chocolate is a crucial step in cake decorating, as it allows for creating beautiful designs and adding delicious flavor to your creations. There are different methods you can use to melt chocolate effectively, with two popular options being the double boiler and microwave. Here’s a look at how each method works:
- Double Boiler: This traditional method involves using a heat-safe bowl placed over a pot of simmering water. The steam from the water gently melts the chocolate in the bowl without direct heat, reducing the risk of burning. To melt chocolate using a double boiler, simply place chopped chocolate in the bowl, stir occasionally until smooth, then remove from heat.
- Microwave: For those looking for a quicker option, melting chocolate in the microwave is a convenient choice. Place the chopped chocolate in a microwave-safe bowl and heat in short intervals, stirring between each one to ensure even melting. Be cautious not to overheat the chocolate, as it can burn easily.
Both methods have their advantages, so choose the one that best suits your preferences and needs when melting chocolate for cake decorating. Each technique requires careful attention to prevent scorching or seizing, ensuring smooth and glossy melted chocolate for your creative designs. Practice with both methods to see which one yields the best results for your cake decorating projects.
When using either method to melt chocolate for cake decorating, keep in mind that high-quality chocolate is essential for achieving optimal flavor and texture in your creations. Whether you prefer white, milk, or dark chocolate, selecting a good-quality product will enhance the overall taste of your decorated cakes. Experiment with different types of chocolates to find your favorite for decorating purposes.
Tips for Successful Chocolate Melting Process
Melting chocolate for cake decorating can be a crucial step in ensuring the success of your dessert creation. Here are some tips to help you achieve perfectly melted chocolate every time:
- Choose the right type of chocolate: Not all chocolates are created equal when it comes to melting. It’s important to choose high-quality chocolate that has a good cocoa content for the best results.
- Use a clean and dry bowl: Before melting your chocolate, make sure that your bowl and utensils are completely dry. Any water or moisture can cause the chocolate to seize up and become unusable.
- Be patient: Melting chocolate requires gentle heat and patience. Avoid rushing the process by using high heat, as this can easily burn the chocolate. Slow and steady wins the race when it comes to melting chocolate.
When it comes to melting chocolate for cake decorating, there are different methods you can use depending on your preference and equipment available:
- Double boiler method: This traditional method involves melting chocolate slowly over a pot of simmering water. It provides a gentle heat that helps prevent overheating and burning the chocolate.
- Microwave method: If you’re looking for a quicker option, you can also melt chocolate in the microwave. Be sure to use low power settings and stir frequently to prevent hot spots and uneven melting.
By following these tips and choosing the right method for melting your chocolate, you’ll be well on your way to successfully decorating cakes with beautifully melted chocolate.
How to Add Coloring or Flavoring to Melted Chocolate
Adding coloring or flavoring to melted chocolate can take your cake decorating to the next level by adding a personal touch and creating unique designs. Whether you want to achieve a specific color or enhance the taste of your chocolate, there are various methods you can use to customize your melted chocolate for cake decorating.
Coloring Melted Chocolate
One popular way to add color to melted chocolate is by using gel-based food coloring. Gel food coloring works best with chocolate as it does not alter the consistency of the chocolate as much as liquid food coloring does. Start by adding a small amount of gel food coloring to your melted chocolate and mix well until you reach your desired color. If the color is too light, gradually add more coloring until you achieve the right shade.
Flavoring Melted Chocolate
To enhance the flavor of your melted chocolate for cake decorating, consider adding extracts such as vanilla, almond, mint, or orange. These extracts can complement the taste of the chocolate and create a more complex flavor profile. Be cautious when adding extracts, as too much can overpower the natural taste of the chocolate.
Start by adding a small amount, taste test, and adjust accordingly. Additionally, you can experiment with different flavored oils like raspberry or coconut for a unique twist on your melted chocolate.
By incorporating coloring and flavoring into your melted chocolate for cake decorating, you can unleash your creativity and personalize your cakes in exciting ways. Experiment with different colors and flavors to create stunning designs that will impress your family and guests. Remember to start with small amounts when adding color or flavor, and don’t be afraid to get creative with combinations that suit your preferences.
Techniques for Decorating Cakes With Melted Chocolate
Decorating cakes with melted chocolate opens up a world of creativity and endless possibilities for adding beautiful and delicious designs to your baked creations. Whether you want to drizzle chocolate over a cake for a simple yet elegant finish or create intricate patterns and decorations, mastering the techniques for using melted chocolate is essential.
In this section, we will explore some popular methods for decorating cakes with melted chocolate, along with tips and tricks to help you achieve professional-looking results.
One of the most common techniques for decorating cakes with melted chocolate is piping. To pipe with melted chocolate, you can use a pastry bag with a small round tip or even a plastic zip-top bag with the corner snipped off.
Fill the bag with melted chocolate, then gently squeeze the bag to allow the chocolate to flow out through the tip. You can create swirls, lines, shapes, letters, or any design you desire by piping the chocolate onto the cake surface.
Another popular technique for decorating cakes with melted chocolate is creating chocolate curls or shaving. To make curls, spread a thin layer of melted chocolate on a baking sheet and let it set until slightly firm but not hard. Use a metal spatula or knife to scrape the chocolate into curls or shavings.
These curls can be arranged on top of your cake for an elegant and eye-catching decoration. Experimenting with different shapes and designs will help you discover your own unique style when it comes to decorating cakes with melted chocolate.
Using stencils is another creative way to decorate cakes with melted chocolate. Simply place a stencil over the surface of your cake, then drizzle or spread melted chocolate over it. Carefully lift off the stencil to reveal a beautifully detailed design on your cake.
Stencils come in various patterns and motifs, allowing you to customize your cake decorations according to different themes or occasions. With these techniques and some practice, you can take your cake decorating skills to the next level and impress your friends and family with stunning creations that look as good as they taste.
| Technique | Description |
|---|---|
| Piping | Use pastry bag or zip-top bag to create swirls, lines, shapes, letters on cakes. |
| Chocolate Curls/Shavings | Create curls by spreading thin layer of chocoalte then scraping into curls. |
| Stencils | Use stencils on top of cake surface while spreading or drizzling chocolate for detailed designs. |
Troubleshooting Common Issues When Melting Chocolate for Cake Decorating
Preventing Chocolate From Seizing
One common issue that can arise when melting chocolate for cake decorating is the chocolate seizing, which happens when moisture comes into contact with melted chocolate. To prevent this from happening, make sure all utensils and bowls are completely dry before using them to melt the chocolate. Additionally, avoid getting any water or steam near the melting chocolate as even a small amount can cause it to seize.
Fixing Overheated Chocolate
Another common problem when melting chocolate is overheating it, which can result in a burnt taste and a gritty texture. If you accidentally overheat your chocolate while melting it, don’t panic. Simply remove it from the heat source immediately and stir in some additional unmelted chocolate to help cool it down. Stir continuously until smooth and glossy again, then proceed with decorating your cake.
Dealing With Thickened Chocolate
If you find that your melted chocolate has become too thick for cake decorating after cooling slightly, there are a few ways to fix this issue. One method is to gently reheat the chocolate either in the microwave or over simmering water until it reaches a pourable consistency again.
Another option is to add a small amount of vegetable oil or cocoa butter to thin out the chocolate while stirring constantly until you reach the desired texture for decorating your cake.
By being aware of these common issues when melting chocolate for cake decorating and knowing how to troubleshoot them effectively, you can ensure that your cake decoration process goes smoothly and results in beautifully decorated treats every time. With practice and patience, mastering the art of working with melted chocolate will elevate your cake decorating skills to new heights.
Conclusion
In conclusion, mastering the art of melting chocolate for cake decorating can truly elevate your skills in creating beautifully decorated cakes. By understanding the importance of properly melted chocolate and choosing the right type for your needs, you can ensure a successful decorating process. Whether you prefer the traditional method of using a double boiler or the convenience of the microwave, knowing the techniques and tips for melting chocolate will help you achieve professional-looking results.
Adding coloring or flavoring to melted chocolate can further enhance your creativity in decorating cakes, allowing you to customize your designs to match any theme or occasion. Experimenting with different techniques for decorating with melted chocolate, such as drizzling, piping, or creating intricate designs, can take your cake decorations to the next level. Even when faced with common issues like seizing or overheating, knowing how to troubleshoot these problems will give you the confidence to tackle any decorating challenge.
Overall, by honing your skills in melting chocolate for cake decorating and incorporating it into your repertoire of techniques, you can truly impress your friends and family with stunning creations. So next time you’re preparing to adorn a cake with beautiful decorations, remember these tips and tricks on how to melt chocolate for cake decorating to make your desserts not only delicious but visually appealing as well.
Frequently Asked Questions
How Do You Melt Chocolate for Cake Covering?
Melting chocolate for cake covering requires a gentle approach to avoid burning or seizing. I prefer using a double boiler method, melting the chocolate slowly over simmering water. Stirring frequently ensures even melting and a smooth consistency that’s perfect for spreading on cakes.
How Do You Thin Melted Chocolate for Decorating?
When it comes to thinning melted chocolate for decorating, I find that adding small amounts of vegetable oil or cocoa butter works well. By gradually incorporating the oil while stirring continuously, you can achieve the desired consistency for drizzling, dipping, or piping decorations. Just be cautious not to add too much oil to avoid altering the chocolate’s flavor.
How Do You Keep Chocolate Melted for Piping?
To keep chocolate melted for piping, maintaining the right temperature is crucial. I suggest using a piping bag warmer or placing the bag in warm water to prevent the chocolate from solidifying as you work. Additionally, gently kneading the piping bag occasionally can help ensure a consistent flow of melted chocolate without any lumps or clogs.

Welcome to our cake decorating blog! My name is Destiny Flores, and I am the proud owner of a cake decorating business named Cake Karma. Our mission is to provide delicious, beautiful cakes for all occasions. We specialize in creating custom cakes that are tailored specifically to each customer’s individual needs and tastes.


