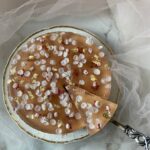
Chocolate curls are a delightful and visually appealing way to enhance the presentation of cakes, adding a touch of elegance and sophistication. In this article, we will guide you on how to make chocolate curls to decorate cakes, elevating your baking skills to a whole new level. By mastering the art of creating these beautiful chocolate decorations, you can effortlessly transform any ordinary cake into a stunning masterpiece that is sure to impress both friends and family.
The importance of chocolate curls in cake decorating cannot be overstated. They not only add texture and depth to the overall look of the dessert but also provide a luxurious touch that instantly elevates its aesthetic appeal. Whether you are preparing a simple homemade cake or an elaborate celebration cake, chocolate curls can serve as the perfect finishing touch, making your creation stand out from the rest.
Choosing the right type of chocolate is crucial when it comes to creating perfect chocolate curls. Opt for high-quality chocolate that melts smoothly and easily solidifies into beautiful curls.
With our step-by-step guide, you will learn everything you need to know about selecting the best chocolate for this purpose and achieving impeccable results every time. Stay tuned as we delve deeper into the world of chocolate decoration and unlock the secrets to mastering the art of making exquisite chocolate curls for your cakes.
Choosing the Right Chocolate
When it comes to making chocolate curls to decorate cakes, choosing the right type of chocolate is crucial. Not all chocolate is created equal, and using the wrong kind can affect the outcome of your chocolate curls. The best types of chocolate for making curls are dark chocolate or semisweet chocolate with a high cocoa content. These varieties tend to have a smooth texture and melt easily, making them ideal for creating delicate curls.
To ensure that your chocolate curls turn out beautifully, it’s important to select high-quality chocolate. Look for brands that use real cocoa butter and avoid those with added oils or fillers. Quality chocolate not only tastes better but also melts more evenly, resulting in smoother and shinier curls. Additionally, choosing a good quality brand can make a significant difference in the overall appearance and taste of your decorated cake.
In order to create picture-perfect chocolate curls, it’s essential to pay attention to details starting from the selection of the right type of chocolate. Investing in high-quality ingredients will elevate the overall look and flavor of your cake design. By following these tips on choosing the right chocolate for making curls, you’ll be well on your way to creating stunning decorations that will impress any cake lover.
| Types of Chocolate | Brands |
|---|---|
| Dark Chocolate | Lindt Excellence Dark Chocolate |
| Semisweet Chocolate | Ghirardelli Chocolate Intense Dark |
Equipment Needed
When it comes to making chocolate curls to decorate cakes, having the right equipment is essential for achieving those perfect, elegant curls that can elevate the appearance of any cake. The key tools needed for making chocolate curls include a high-quality vegetable peeler or cheese slicer, a baking sheet, parchment paper, and of course, a good quality chocolate bar.
The vegetable peeler or cheese slicer is crucial in creating those thin strips of chocolate that will eventually curl up beautifully on top of your cake. Make sure to choose a peeler with a sharp blade to easily slice through the chocolate without breaking it. Additionally, having a baking sheet lined with parchment paper provides the perfect surface for creating and storing your chocolate curls without them sticking or melting together.
In terms of selecting the right chocolate bar for making curls, opt for high-quality chocolate with a high cocoa content as it will produce better results. Dark chocolate is ideal for creating defined curls with a rich flavor, while milk chocolate can add a touch of sweetness to your cake decorations.
Avoid using compound chocolates or candy melts as they may not curl properly and could result in an unsatisfactory outcome. With the proper tools and ingredients in hand, you’ll be well-equipped to craft beautiful chocolate curls to adorn your cakes with style and elegance.
| Equipment | Purpose |
|---|---|
| Vegetable Peeler | To create thin strips of chocolate |
| Baking Sheet | Provides a surface for making and storing curls |
| Parchment Paper | Prevents curls from sticking or melting together |
| Good Quality Chocolate Bar | Essential ingredient for crafting perfect curls |
Preparing the Chocolate
Step-by-Step Guide on How to Properly Melt the Chocolate
To begin the process of making chocolate curls to decorate cakes, it is essential to first properly melt the chocolate. Start by chopping the chocolate into small, uniform pieces to ensure even melting. You can use a double boiler or microwave to melt the chocolate.
If using a microwave, heat the chopped chocolate in short intervals, stirring in between each burst of heat to prevent burning. For a double boiler, place the chopped chocolate in a heatproof bowl set over a pot of simmering water, making sure the bottom of the bowl does not touch the water. Stir frequently until completely melted and smooth.
Tips for Using the Right Temperature to Achieve the Perfect Consistency
One crucial factor in preparing chocolate for curls is achieving the right temperature. Overheating chocolate can cause it to become lumpy or scorch, while underheating may result in a thick and unworkable consistency.
Use an instant-read thermometer to ensure that the melted chocolate reaches around 88°F (31°C) for dark chocolate and 86°F (30°C) for milk or white chocolate. This temperature range allows the chocolate to be fluid enough for curling but also firm enough to hold its shape once curled onto a cake.
Ensuring Your Chocolate Is Ready for Curling
Before attempting to create curls from your melted chocolate, it’s important to test its readiness. To do this, dip a spoon into the melted chocolate and then drizzle it back into the bowl.
The drizzled lines should hold their shape briefly before blending back into the rest of the chocolate. If they immediately melt back into one flat pool of chocolate, it may need further cooling or stirring until it reaches that ideal consistency for forming perfect curls on your cakes.
Creating the Curls
Creating beautiful chocolate curls to decorate cakes is a simple yet impressive way to add an elegant touch to your baked creations. Whether you’re looking to adorn a birthday cake, wedding cake, or any other special occasion treat, chocolate curls can instantly elevate the overall appearance of your dessert. Learning how to make chocolate curls may seem daunting at first, but with the right techniques and tools, you can easily master this decorative skill.
To create perfect chocolate curls for decorating cakes, you will need the following equipment:
- A high-quality chocolate bar
- A vegetable peeler or a special chocolate curler tool
- A cutting board or parchment paper
- A warm cloth or heating pad (optional)
When choosing the right type of chocolate for making curls, opt for high-quality dark or milk chocolate that contains at least 60% cocoa content. Avoid using compound chocolates as they do not have the same flavor or consistency needed for creating beautiful curls. Investing in good quality chocolate will ensure that your curls turn out glossy, flavorful, and easy to work with.
Now that you have gathered all the necessary tools and ingredients, follow these steps on how to make chocolate curls to decorate cakes:
- Start by melting your chocolate using a double boiler or microwave at low heat.
- Once melted and smooth, pour the liquid chocolate onto a flat surface like a cutting board or parchment paper.
- Using a vegetable peeler or a special curler tool, gently scrape along the surface of the hardened chocolate to create thin and delicate curls.
Experiment with different techniques such as changing the angle of your peeler or applying varied pressure to achieve various sizes and shapes of curls. With practice and patience, you’ll soon be able to create stunning chocolate curls to embellish your cakes with style.
Decorating the Cake
When it comes to cake decorating, chocolate curls can truly take your confectionery creations to the next level. Their elegant and sophisticated appearance adds a touch of luxury and indulgence to any cake, making it a show-stopping centerpiece for any occasion. Whether you’re preparing a simple birthday cake or an elaborate wedding dessert, chocolate curls are sure to impress your guests and elevate the overall presentation of your sweet treat.
Ideas for Creative Cake Decoration
There are countless ways to incorporate chocolate curls into your cake decorations, allowing you to unleash your creativity and personalize your desserts. Consider using chocolate curls to create intricate patterns and designs on top of your cakes, or sprinkle them around the edges for a simple yet effective finishing touch. You can also use chocolate curls to add texture and dimension to your cakes, creating a visually appealing contrast with other decorations like fresh fruit or edible flowers.
Adding Chocolate Curls to Various Cake Designs
Whether you’re decorating a classic vanilla sponge cake or a rich chocolate ganache torte, chocolate curls can complement a wide range of cake flavors and styles. For a more rustic look, scatter chocolate curls haphazardly across the top of your cake for a whimsical touch.
Alternatively, you can arrange chocolate curls in neat rows or concentric circles for a more polished and professional appearance. Experiment with different placement techniques to find the design that best suits the theme and aesthetic of your cake.
Enhancing Flavor With Chocolate Curls
Not only do chocolate curls enhance the visual appeal of your cakes, but they also add another layer of flavor and richness to each bite. The smooth texture and intense cocoa taste of high-quality chocolate will complement the sweetness of the cake itself, creating a harmonious balance that will delight your taste buds.
To truly impress your guests, consider pairing different types of chocolate curls with specific cake flavors – for example, dark chocolate curls on a white chocolate raspberry cake for an unforgettable culinary experience.
By incorporating these creative ideas into your cake decorating repertoire and mastering the art of making perfect chocolate curls, you’ll be able to impress friends and family with beautifully decorated desserts that taste just as good as they look. Experiment with different techniques, flavors, and designs until you find the perfect combination that suits your personal style and preferences.
With practice and patience, you’ll soon become a master at using chocolate curls to transform ordinary cakes into extraordinary works of edible art.
Storing Chocolate Curls
When it comes to storing chocolate curls, it is essential to take the necessary precautions to keep them fresh and maintain their shape. Here are some tips on how to store your chocolate curls effectively:
- Store in an airtight container: The best way to store chocolate curls is in an airtight container. This will help prevent moisture from getting to the curls and causing them to lose their shape.
- Avoid direct sunlight: It is important to keep the container of chocolate curls away from direct sunlight or any heat source. Excessive heat can cause the curls to melt and lose their texture.
- Refrigerate if necessary: If you live in a hot or humid climate, it may be best to refrigerate your chocolate curls. Make sure to let them come to room temperature before using them to decorate your cakes.
Properly stored chocolate curls can last for several weeks, depending on the type of chocolate used. Dark chocolate curls tend to have a longer shelf life compared to milk or white chocolate curls. Remember that fresher is always better when it comes to decorating cakes with chocolate curls.
Troubleshooting
When it comes to creating beautiful chocolate curls to decorate cakes, there may be times when you encounter some troubleshooting issues along the way. One common problem that many bakers face is chocolate that is too thick or clumpy, making it difficult to achieve those delicate curls. If you find yourself in this situation, don’t worry – there are simple solutions to help you salvage your chocolate curls.
To troubleshoot thick or clumpy chocolate, try adding a small amount of vegetable oil or melted cocoa butter to the mixture. This will help thin out the chocolate and make it easier to work with. Another tip is to ensure that your chocolate is at the right temperature before attempting to create curls. Chocolate that is too hot can become runny and difficult to shape, while chocolate that is too cool may harden too quickly.
Another issue that may arise when making chocolate curls is them breaking or crumbling as you try to create them. To prevent this from happening, make sure that your chocolate has been tempered properly before attempting to curl it. Tempering helps stabilize the cocoa butter in the chocolate, giving it a smooth and glossy finish that is less likely to break.
Additionally, be gentle when handling the curls and use a light touch when shaping them with a vegetable peeler or curling tool. With practice and patience, you’ll soon be able to create perfect chocolate curls every time.
Conclusion
In conclusion, mastering the art of making chocolate curls to decorate cakes can truly take your baking skills to the next level. By following the steps outlined in this article, you can easily create beautiful and elegant decorations that will impress any guest or customer. Chocolate curls not only add visual appeal to your cakes but also elevate the overall taste experience.
Learning how to make chocolate curls is a fun and rewarding process that allows for creativity and experimentation. From choosing the right chocolate to selecting the tools needed and mastering different techniques, there are endless possibilities for creating unique decorations for your cakes. By incorporating chocolate curls into your cake decorating repertoire, you can easily transform a simple dessert into a stunning masterpiece.
So why not give it a try? Follow the tips and guidelines provided in this article on how to make chocolate curls to decorate cakes, and let your imagination run wild. Whether you’re a beginner or an experienced baker, exploring the world of chocolate curls can open up new avenues for creativity in your baking endeavors. Start experimenting with different flavors, shapes, and designs today and watch as your cakes become works of art.
Frequently Asked Questions
Why Are My Chocolate Curls Not Curling?
Chocolate curls may not be curling due to various factors such as the temperature of the chocolate, the method used to create them, or the quality of the chocolate itself. Ensuring that the chocolate is at the correct temperature and using a sharp utensil to create curls can help improve their curling ability.
How Do You Make Chocolate Curls From a Bar?
Making chocolate curls from a bar involves using a vegetable peeler or a knife to carefully shave thin layers off the surface of the chocolate bar. The technique involves applying gentle pressure while dragging the peeler or knife along the surface of the chocolate. This creates delicate curls that can be used for decoration on desserts.
How to Make a Spiral Out of Chocolate?
Creating a spiral out of chocolate is a technique that involves carefully melting chocolate and then piping it onto parchment paper in a spiral shape. Once piped, gently roll up the parchment paper starting from one end to create a spiral effect with the chocolate.
Allow it to set before carefully unrolling and using it as a decorative element on desserts such as cakes or pastries.

Welcome to our cake decorating blog! My name is Destiny Flores, and I am the proud owner of a cake decorating business named Cake Karma. Our mission is to provide delicious, beautiful cakes for all occasions. We specialize in creating custom cakes that are tailored specifically to each customer’s individual needs and tastes.

